
Being a generation that is so obsessed with gaming, we always look for options to make our gaming experience seamless and perfect. Hands down, Windows 10 is the Best Operating System for your gaming needs. It has got all the features like great support for different gameplays, Xbox one live streaming feature, and much more.

However, it might need a little tweaking here and there to make it the perfect operating system for the perfect gaming experience. There are a lot of Windows 10 optimization techniques that you can use to make sure that you have an amazing time playing games on your Windows 10 system.
Optimize your Windows 10 PC by applying these tips and tricks into your system.
This article will cover all the tips and tricks that you can implement to optimize your PC for gaming.
10 Ways to Optimize Windows 10 for Gaming
The usual issues in Windows 10 system concerning gaming usually is from the improper network issues and poor usage of the CPU and the graphic card memory in the system. These tips and tricks will make sure that you do not have to face such issues and always have an amazing game time with your system.
1. Enable Windows 10 Gaming mode

The first thing that you need to do when you are into the optimization process is to follow this trick. Use the Windows 10 gaming mode that is available within the operating system itself. Well, if you are not able to find this particular feature in your system, then it is evident that your system is not built for playing hardcore games because this feature comes with a limited set of systems that are optimized for gaming.
If your system has the gaming mode, then this is how you toggle it.
- Press the Win Key+ I to open the settings option of your system.
- In the main page of the settings, you will find the option gaming, if your system is built for gaming.
- Click on that and toggle on the gaming mode or you should see a text saying “This PC supports Game Mode“
- Once you are done with these steps, try opening a game and the response would be much better than before.
2. Disable Nagle’s Algorithm
If you are wondering what is Nagle’s algorithm, don’t worry, it is quite simple. It is an algorithm that helps the Windows 10 system to improve the efficiency of the TCP/IP networks. They work by reducing the number of data packets that usually get sent over the network and this will lead to poor internet connections. When you are gaming, a slow internet connection can make things worse for your gameplay, so it is better that you disable Nagle’s Algorithm to optimize windows 10 for gaming.
- Open the Run dialog box by pressing the Win Key+R.
- Type regedit and proceed by clicking OK.
- This will open the registry editor window. In the window, Navigate to HKEY_LOCAL_MACHINE\SYSTEM\CurrentControlSet\
Services\Tcpip\Parameters\Interfaces - To access the main file amidst all the other files that are present in the window, you must match your IP address to the listed DhcpIPAddress.
- On the right panel of the window, right-click and choose New–>DWORD (32-bit) Value.
- After that, you need to create two new keys and name them as TcpAckFrequency and TCPNoDelay and change their data value to 1 by double-clicking on each one of them.
The completion of these steps would disable Nagle’s Algorithm. Make sure to proceed with each step with caution as you are dealing with registry files.
3. Disable Automatic Updates
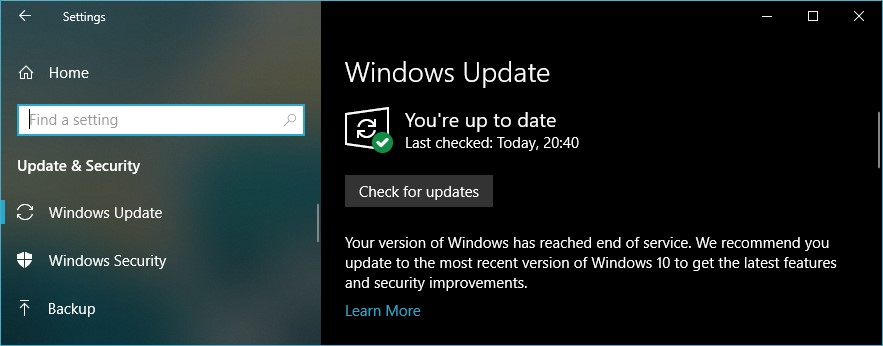
When it comes to updates, it occurs at frequent intervals in a Windows 10 system. This will directly affect your gaming experience as well. Most of the updates that happen in a Windows 10 system are automatic meaning that they can get updated at the instant when an update becomes available. This is good for a normal system user, but if you are using the Windows 10 system for gaming, it would be better for your gaming experience if you disable the automatic system updates from Windows. Here is how you do it.
- Press Win Key+ I to open the settings.
- Navigate to Update and security–>Windows Update.
- Click the advanced options and click on Update options.
- Disable the available restart feature. This will no longer prompt the user to restart when a system update is available.
- Enable the Show a notification option that will notify the user when an update is available.
- Pause the updates for up to nearly 35 days.
This will disable the automatic update feature of the system and optimize your PC for gaming. Now when you disable the automatic windows updates, you can also solve the high CPU usage issue of the Windows module installer is a Windows update service that runs in the background. This service usually consumes a lot of CPU usage when it runs making your gameplay sluggish and slow. You can follow this guide to solve the high CPU usage of Windows module installer.
Once you complete this windows 10 performance tweaks for gaming, you would find a drastic increase in the gaming performance of your PC.
4. Upgrade to SSD
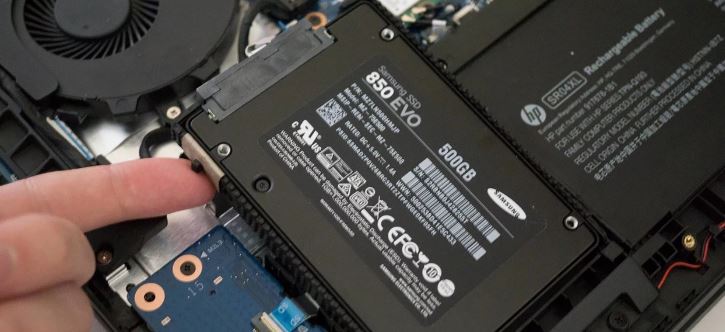
If you are planning to increase the performance of Windows 10 and decrease the load time of your game in your Windows 10 PC, we would recommend you to upgrade to an SSD, if you are currently using HDD. This will optimize the system for gaming and enhance the performance of your gameplay.
Usually when you are transferring from an HDD to SSD, data loss is certain. To make sure that there is no data loss, use any of the clone tools that are available in the market. This will enable you to clone OS from HDD to SSD without any loss of data.
5. Upgrade GPU drivers
We all know the Graphics Processing Unit (GPU) is the core component of the system that takes care of your gaming experience. The GPU also needs to be updated with the latest drivers continuously to make sure that there is no lag in the system gameplay. Well to update the GPU drivers, follow the following steps.
- Right-click on the desktop and navigate to display settings–> Advanced display settings.
- This will open a window where you need to locate Display Adapter Properties.
- You can update the driver by navigating to Properties–>Driver–>Update Driver.
- If your driver is already updated, a pop up will show that your driver is up to date. Make sure to cross verify once in the manufacturer’s site if the driver is updated to the latest version.
Keeping your GPU drivers updated will make sure that your game loads in quick time slots.
6. Adjust your Mouse settings

When you are playing shooting games or any FPS game, it is very important to have a responsive mouse to help you move through the levels of the gameplay. If your mouse is not responsive especially in an FPS game, it will lead to choppy gameplay which you don’t want to happen, especially in an FPS game.
- Open the settings by pressing the WinKey +I.
- In the devices, navigate to the mouse settings.
- In the pointer options tab, Uncheck the Enhance Pointer Precision checkmark.
- Set the pointer precision according to your requirements before clicking on OK.
If you feel there is a very good response in the gameplay after this tweak, it is pretty evident that the mouse was slowing down the gameplay all this time.
7. Use High-Performance Power Plan
To optimize the gaming in your PC, this is probably the most efficient method to follow to make sure you optimize your Windows 10 for gaming. The high-performance plan is a part of the system performance and after you switch to the high-performance plan, you will notice a significant pump in the performance of your gameplay.
- Press WinKey+I to open the settings window.
- Choose the system settings.
- In the window, select the Power and sleep tab and click on additional power settings.
- In the options, select the high-performance model.
- If you do not have an option of High-performance then you can Select “Create a Power Plan” and then select “High performance”.
Note that, when you are switching to the high-performance mode, your battery will drain faster if you are using a windows 10 laptop.
8. Install DirectX 12
DirectX 12 is an important application that needs to be installed into your computer if you are looking forward to optimizing your Windows 10 system for gaming. It enhances the communication between the computer and the user leading to a smooth gameplay interface.
- Open the Run dialog box by pressing Win Key+ R.
- Type dxdiag in the box and click OK.
- If you already have the DirectX 12 on your computer, it will open the DirectX Diagnostic tool window.
- If this does not open, you can directly install the DirectX 12 through Windows update. You can read more about it here.
9. Manage Steam Auto Updates
Steam is where gamers thrive the most, but it can also one of the reason as to why you are facing issues with your gameplay. I am talking about the automatic game updates from steam. They have a significant effect on your gaming experience. So it is always best to manage the automatic steam updates to optimize your PC for gaming.
There are two different things that you need to do to make sure that you can manage the steam auto-updates.
Step 1: Prevent updates in the Background.
- Launch the Steam client and navigate to settings–>Download.
- Uncheck the option “Allow downloads during gameplay”
- This will stop the background updates of your games.
Step 2: Stop updating Unused games
- Open your library on Steam.
- Right-click on a game that you do not use pretty often.
- Right-click on it and navigate to Properties–>Automatic updates.
- Inside that, change the option from Always keep the game up to date to the Only update when launched option to prevent updating games that you hardly play.
This will make your windows 10 system optimized for gaming.
10. Use fast DNS servers
Internet and network issues are the major culprits that potentially slow down your gameplay especially when you are playing online multiplayer games.
To make sure that you are not facing any issues concerning the network, it is best to use fast DNS servers to speed up your gameplay while playing online games.
- Open the settings window and Navigate to Network and internet–>Change adapter settings.
- In the wireless network option, right-click on the same and select Properties.
- Hover over the Internet Protocol Version 4 and take note of the DNS entries. It might come handy in future changes.
- Replace them with 1.1.1 and 1.0.0.1 and click OK and close.
- Restart your browser and your internet should have become faster.
Conclusion
These are all the tips and tricks that will resolve the issues that you face concerning Network, CPU, and GPU usage. All these methods will help you in optimizing the Windows 10 system to the best to make sure you have good gaming experience. When it comes to dealing with registry files, it would be better if you proceed with caution as they are all critical files that run other programs as well on your computer.
Make sure to follow the steps mentioned in all of the options to make sure that your PC is optimized for some hardcore gaming experience.