
In Today’s world there are many reasons a user might want to take a screenshot of his or her computer on windows 10 and it makes it much easier taking screenshot on windows 10 or 11 with snip and sketch tool on windows computer.

Snip and sketch tool on windows computer makes it easier to capture entire screen or part of screen and capture screenshot of any website or your computer and you can take snip after 3 seconds and also you can take snip after 10 seconds using snip and sketch tool and its pretty easy to use snip and sketch tool on windows 11 or 10 computer.
Shortcut to Open Windows Snip and Sketch App
You need to press windows key + Shift key + S all together and capture your window screen with options like full screen, rectangular snip, freeform snip, windows snip easily.
Features of Windows 10 Snip and Sketch Tool
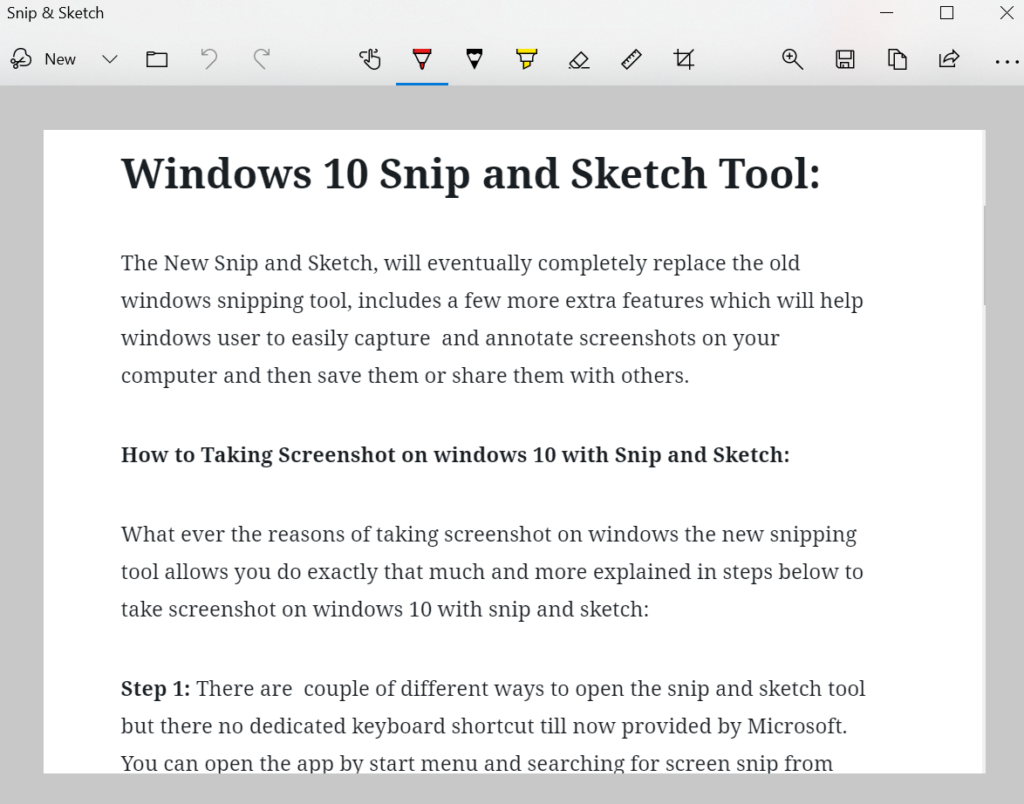
The New Snip and Sketch, will eventually completely replace the old windows snipping tool in future but you can also use snipping tool as well and the new snip and sketch tool includes a few more extra features which will help windows user to easily capture and annotate screenshots on your computer and then save them or share them with others.
New Features of Windows Snip and Sketch App includes -> Take a new snip, take a new snip after 3 seconds, after 10 seconds and crop and draw and edit screenshot or snip and you can take freeform snip, full screen snip, window snip and crop edit and share as well and also you can open file and edit using snip and sketch app on windows 11 or 10 computer.
How to Take Screenshot on windows 10 with Snip and Sketch
What ever the reasons of taking screenshot on windows the new snipping tool allows you do exactly that much and more explained in steps below to take screenshot on windows 10 with snip and sketch:
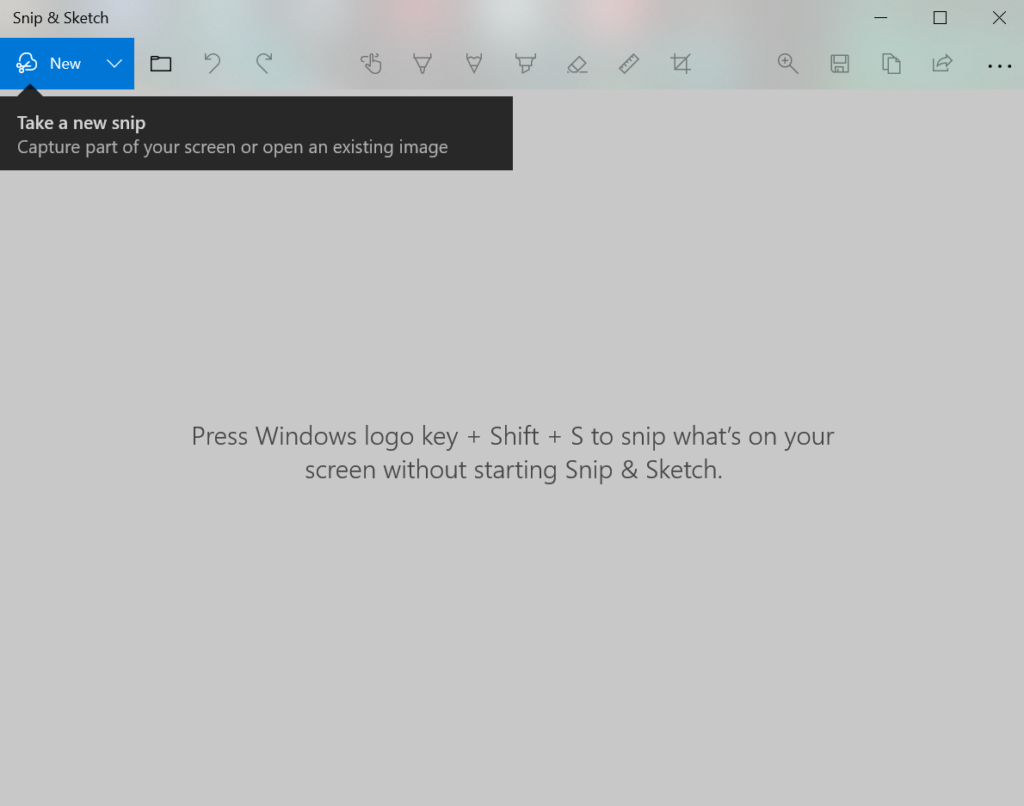
Step 1: First, Open Snip and Sketch tool and there are couple of different ways to open the snip and sketch tool but there no dedicated keyboard shortcut till and press windows logo key + Shift + S. You can open the app by start menu and searching for screen snip from quick action panel.
Step 2: If you open screen snip tool, it will open as blank window with a variety of buttons along the top for editing or writing text on captured images. The new button takes you to snipping mode, if you open the tools using quick action it goes straight to snipping mode.
Step 3: Click the new button to begin snipping. The screen will darken and you will see a small toolbar appear at the top. From the left to right, the tools here are rectangular clip and full screen clip. Lets start with the most useful of the three, the rectangular clip tool.
Step 4: Move the + Cursor to the corner of the area you want to capture and click and hold the left mouse or trackpad button. Drag the cursor down and you will see the capture are highlighted. When you have the correct area of the screen highlighted release the mouse button to snip.
Step 5: The Captured image will now appear in the previously blank snip and sketch window. If the image is all you need, you can simple click and save the button in the top right and choose where you want to store the image. You can also make a copy of the image here and also share the image vie email, skype etc..
Step 6: To Capture a frame screenshot, open the snipping mode again and click the second of the tools at the top. You can now use the mouse to draw around the area you want to capture an cutting out of shape you want.
Step 7: In the top middle of the snip and sketch window there is a set of editing tools as well you can use them to alter the captured image which also gives you ability to write and draw on the captured screenshot with snip and sketch tool in windows 10 and also crop the captured image down to size.
Step 8: Click on any of the pencil tools to select them and then click again to open an additional tools menu. This menu will let you change the colour of the pen or pencil and also change the thickness of the line to draw by using the slider from the menu panel of snip and sketch tool.
By following above 8 steps you will be able to take screenshot on windows 10 with snip and sketch.
How to Take Screenshot on Windows 11 or 10
You can use snipping too, snip and sketch tool and press print screen button and edit screenshot using print screen and take screenshot on windows 11 or 10.
How to Take a Cropped Screenshot on Windows 11
Press windows logo + Shift key + S and select rectangular on top of your screen and capture screen shot and then click on crop button on top and edit and crop screenshot using snip and sketch app on windows 11 or 10 computer.